Migrate from Heroku to Render
Bring your Heroku apps and data to the Render platform.
Heroku has transitioned to maintenance-focused support as of February 6, 2026.
The Render team can help you orchestrate your migration to minimize downtime, even for apps with multi-terabyte databases.
See examples of minimal-downtime migrations by ReadMe and Reservamos.
Welcome! Let's move your Heroku apps and datastores over to Render. You'll learn:
- How Heroku concepts translate to the Render platform
- How to model a Heroku app as one or more Render services
- How to move your Heroku datastores to Render Postgres and Key Value instances
If you hit any bumps, don't hesitate to contact our support team at support@render.com. For assistance with migrating complex architectures or very large databases, get help here.
Why migrate?
Independent of Heroku's recent announcement, for years developers have found that running on Render reduces costs and provides more capabilities out of the box, such as private networking, long-lived HTTP/WebSocket connections, and built-in DDoS protection.
Concept mapping
Before we start, let's translate some helpful terms from Heroku to Render:
- On Heroku, you deploy apps. They run on dynos.
- On Render, you deploy services. They run on instances.
- Your Heroku app's dyno type determines compute specs (CPU and RAM).
- Your Render service's compute plan does the same.
- On Heroku, you apply runtime configuration by setting config vars.
- On Render, these are environment variables.
That covers the basics. If you're looking for the Render equivalent of a particular Heroku feature, here's a more extensive mapping:
Show terminology mapping
Compute
| Heroku | Render |
|---|---|
|
App |
Service |
|
Dyno |
Instance |
|
Dyno type (Eco, Basic, etc.) |
Compute plan ( |
|
Web dyno |
Web service |
|
Worker dyno |
Background worker |
|
Heroku Scheduler / clock process |
Cron job |
|
Config vars |
Environment variables |
Deployment
| Heroku | Render |
|---|---|
|
Release phase (The |
Pre-deploy command |
|
Preboot |
This is the default behavior for Render services. |
Observability
| Heroku | Render |
|---|---|
|
Log drain |
Datastores
| Heroku | Render |
|---|---|
|
Heroku Postgres |
Render Postgres |
|
Heroku Key-Value Store |
Render Key Value |
1. Prepare to migrate
Now, let's make sure you have all the accounts and app details you need to migrate successfully.
Create your Render account
Signing up is fast and free:
Catalog your Heroku resources
Identify the Heroku apps you want to migrate. Note the following for each:
-
All processes defined in the app's Procfile (
web,worker, etc.):- On Render, we'll represent each of these processes as a separate service.
- The command for each process will serve as the corresponding Render service's start command.
-
All defined config vars (i.e., environment variables)
-
Any attached Heroku Postgres and Heroku Key-Value Store add-ons
You can continue using many Heroku add-ons after moving your app to Render.
For example, if you're using Heroku's SendGrid add-on, you can set all of your app's SENDGRID_* environment variables on your new Render service.
2. Recreate your app on Render
Next, let's spin up Render resources that correspond to your Heroku app's processes and datastores.
Create datastores
Migrating a large database?
The Render team can help you orchestrate your migration to minimize downtime, even for apps with multi-terabyte databases.
See examples of minimal-downtime migrations by ReadMe and Reservamos.
We recommend creating any necessary Render Postgres and Key Value instances before you deploy the apps that use them. This way, your apps can connect to those datastores on their very first deploy.
We won't move your existing data from Heroku to Render yet.
We'll do this as part of the final migration process.
Follow these steps for each Heroku Postgres and Heroku Key-Value Store add-on you want to move:
-
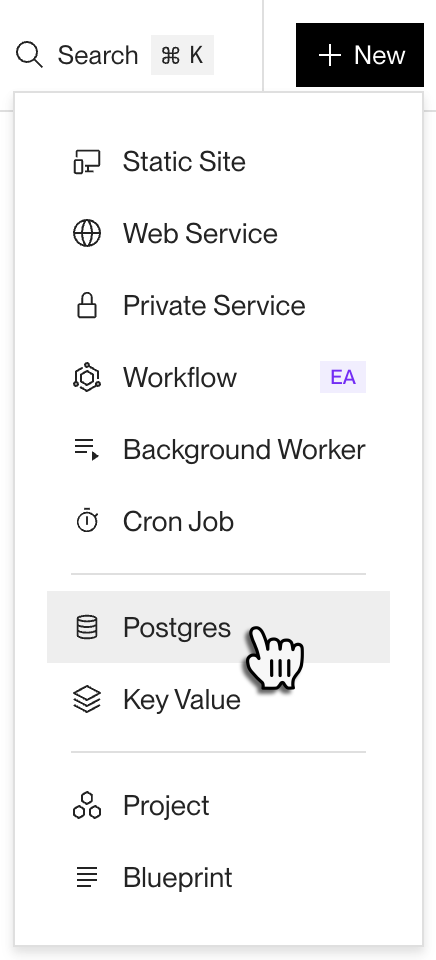
In the Render Dashboard, click New > Postgres or New > Key Value:
-
Specify the following:
- Your datastore's name
- The region where you want to host the datastore
- Which compute plan to run on
- Free compute plans are available for Render Postgres and Key Value to help you get started. See details.
- Your starting storage (Postgres only)
- Feel free to start with a small amount of storage (1 GB or 5 GB) for testing. You can increase a database's storage later, but only once every 6 hours.
-
Click the Create button.
Render provisions your new datastore, and it becomes available within a minute or two.
-
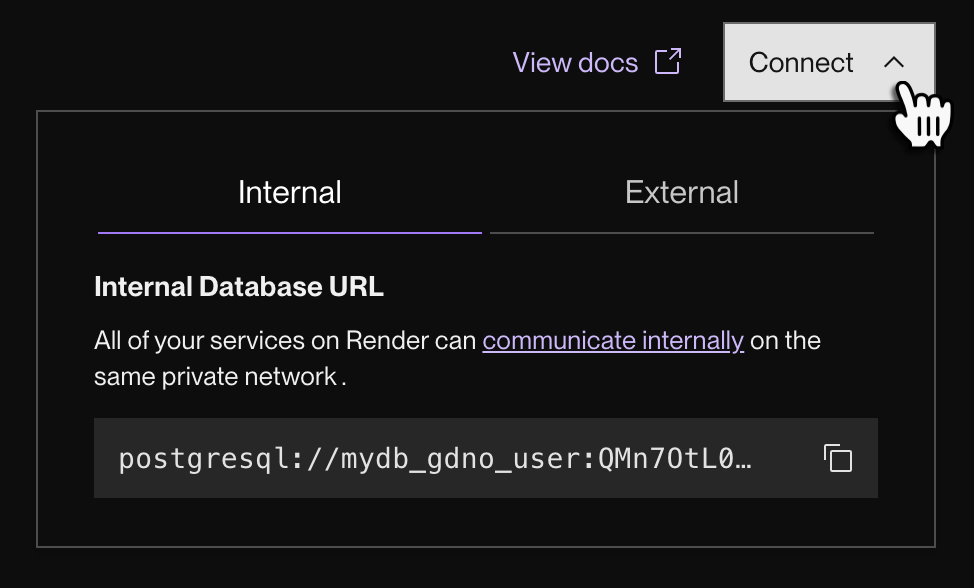
After your datastore becomes available, open its Info page in the Render Dashboard and click the Connect dropdown in the top right:
-
Copy your datastore's internal URL. Your Render services will use this URL to connect to the datastore over a private network.
- External clients (like your local development environment) can instead connect to the datastore via its external URL, which is available in the same dropdown.
-
Repeat this set of steps for each Heroku Postgres and Heroku Key-Value Store add-on you want to move.


Create services based on your Procfile
Most Heroku apps define a file named Procfile in their repo's root directory. This file defines startup commands for each of the app's distinct processes.
Here's an example Procfile for a generic Node.js app (the same concepts apply to any language):
Let's look at how to replicate this configuration on Render.
The web and release processes
Your Heroku app's web process is the only process that receives HTTP traffic from the internet. On Render, this corresponds to a web service. Every web service receives an onrender.com subdomain, and you can add your own custom domains.
-
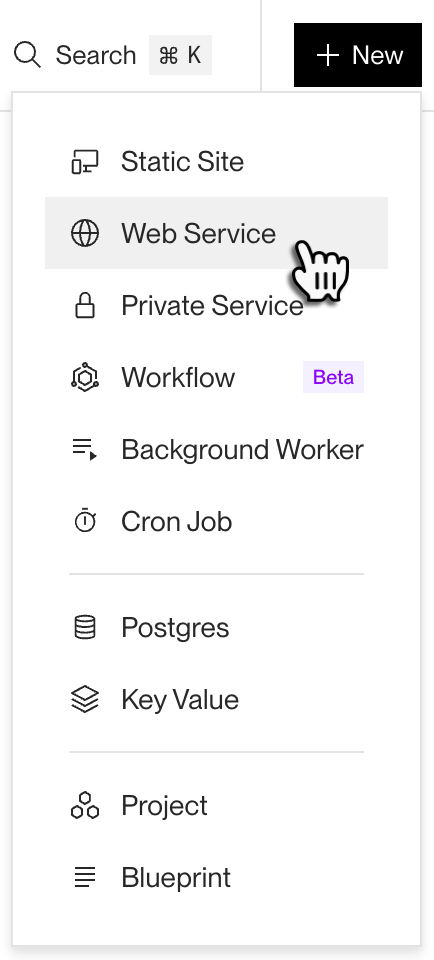
In the Render Dashboard, click New > Web Service:
-
Specify the following:
- Your project repo and branch to deploy (from a Git provider)
- Your app's language (Node.js, Python, etc.)
- The region where you want to host the service
- Choose the same region as your datastores to enable low-latency private network communication.
- Which compute plan to run on
- Render offers a free compute plan for hobby projects and testing out the platform.
-
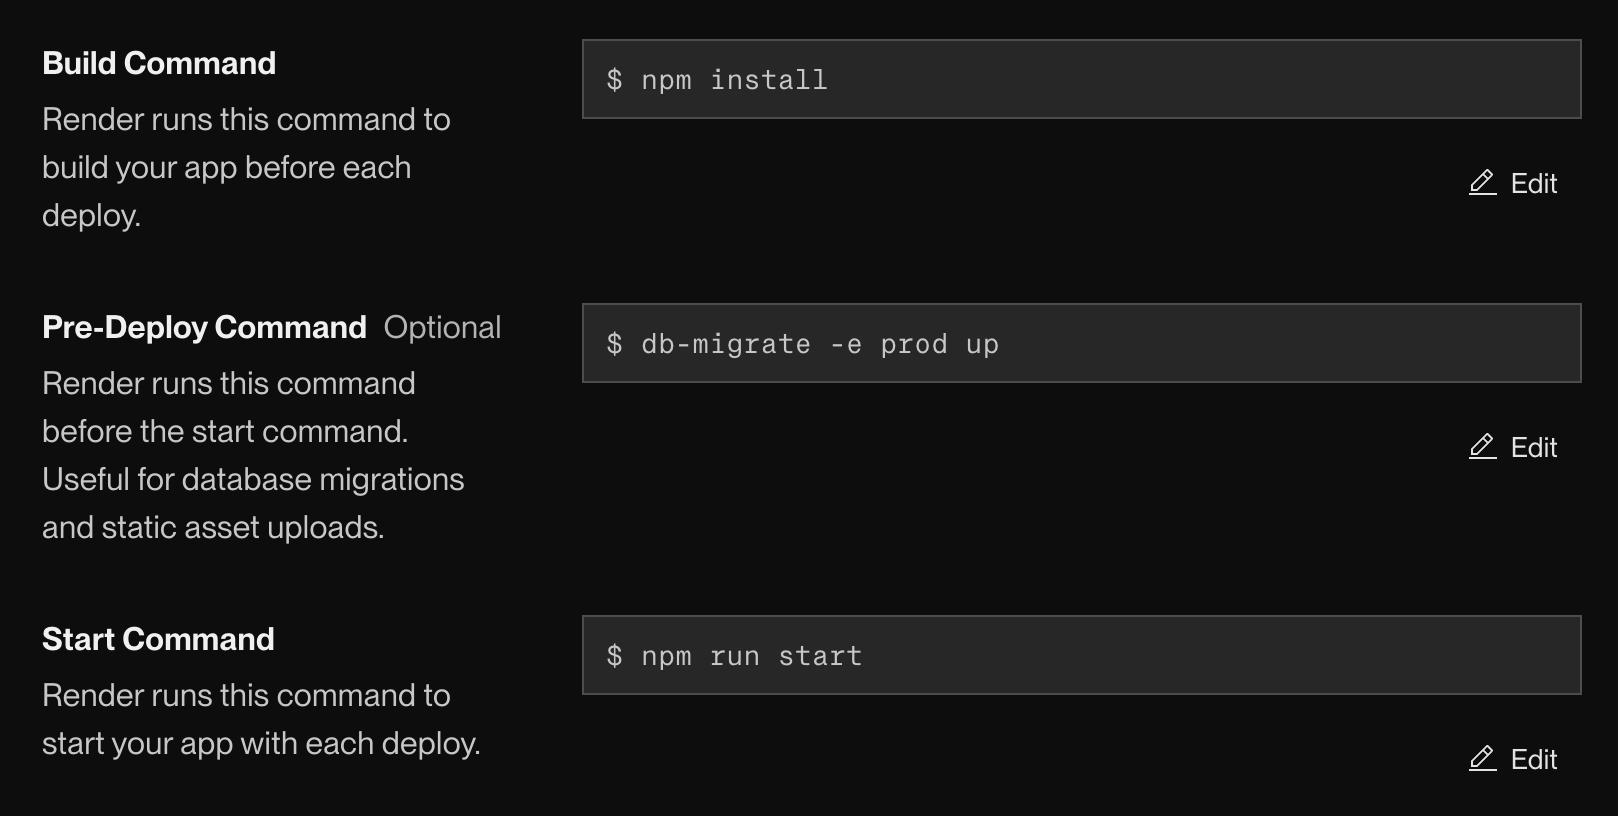
Provide the commands that Render will use to build and run your code:
Command Value Build Command
In most cases, provide the same command you use to build your project locally, such as
npm installfor Node.js orpip install -r requirements.txtfor Python.If necessary for your framework, modify the command to create a production build instead of a development build.
Pre-deploy Command (optional)
Provide the same command as your Procfile's
releaseprocess, if any.Similar to Heroku's release phase, Render runs the pre-deploy command immediately before each deploy of your service. Use it to run database migrations and other setup tasks.
Start Command
Provide the same command as your Procfile's
webprocess.Common examples of start commands include
npm run startfor Node.js andgunicorn your_application.wsgifor Python.Here are commands for the example Node.js Procfile above:
-
Set any required environment variables for your web service:
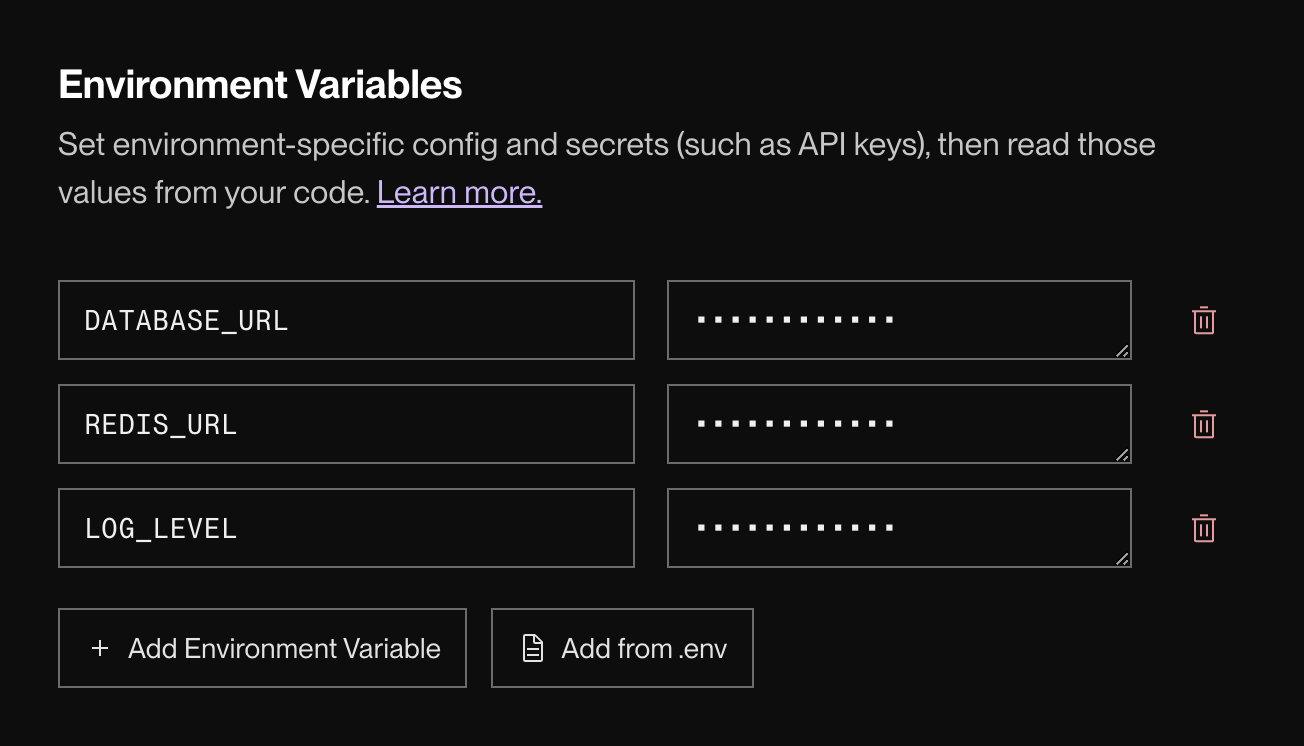
- For datastore connections, provide the internal datastore URLs you copied earlier.
- For an app you're moving from Heroku, these environment variables are often named
DATABASE_URLfor Postgres andREDIS_URLfor Key Value.
- For an app you're moving from Heroku, these environment variables are often named
- For other environment variables, copy over the values from your Heroku app's config vars.
- You can make changes to your service's environment variables at any time after your service is created. See details.
- For datastore connections, provide the internal datastore URLs you copied earlier.
-
Click Deploy Web Service.


You're all set! Render kicks off your service's first deploy. You can view the build logs in the Render Dashboard.
When the deploy completes, your service will be live at its onrender.com subdomain. If you encounter any issues, see Troubleshooting Deploys.
Non-web processes
If your app defines non-web processes in its Procfile, those processes don't receive incoming network traffic. Instead, they usually process jobs from a queue. On Render, these correspond to background workers:

The steps for creating a background worker are similar to those for creating a web service. The key differences are:
- Your background worker probably doesn't need to run a pre-deploy command if your web service already handles database migrations.
- Render does not provide a free compute plan for background workers.
Complete the background worker creation process for every non-web process in your app's Procfile, specifying the appropriate build and start command for each.
Services do not share environment variables by default.
If your web service and background workers require some of the same environment variables, you can do one of the following:
- Manually set the environment variables for both services
- Create an environment group and apply it to both services
3. Swap over to your Render infrastructure
With everything up and running on Render, we're ready to move your data and DNS configuration over from Heroku.
This final step (moving your data and DNS configuration) requires downtime for your app, even if brief.
Schedule your migration for off hours to minimize the impact on your users.
For assistance with a complex migration, get help here.
Scale up your Render datastores
Before you move over your data, make sure your Render Postgres and Key Value instances have sufficient storage and compute resources to handle your current requirements. You can upgrade as needed in the Render Dashboard.
Render Postgres
- You can increase your storage once every 6 hours. You can't decrease it.
- You can change your compute plan (upgrade or downgrade) at any time. Your database will be unavailable for a few minutes during the change.
Render Key Value
- You can upgrade your compute plan at any time. Your Key Value instance will be unavailable for a few minutes during the change.
- You can't downgrade your compute plan.
Enable maintenance mode on Heroku
When you're ready to kick off the migration, put your Heroku app into maintenance mode so that it no longer accepts user traffic. This helps ensure that no changes are made to your datastores during the migration.
Using the Heroku CLI, run:
Export data from Heroku Postgres
-
Create a backup of your database.
Using the Heroku CLI, run:
-
Download the backup.
Using the Heroku CLI, run:
This downloads a file named
latest.dumpto your local computer.
Import data into Render Postgres
-
Obtain your Render Postgres database's External Database URL from its Info page in the Render Dashboard.
-
Import
latest.dumpinto your Render Postgres database.
If your database is larger than 20 GB or under heavy load, use Heroku's instructions to create a backup of your data.
After the backup completes, you can use the same pg_restore command above to import the data to your Render Postgres database.
Consider using the --jobs flag available to both the pg_dump and pg_restore commands to reduce the time required for backup and restore.
Update your DNS records
If your Heroku app uses a custom domain, follow the instructions to update your DNS configuration to point to Render instead of Heroku. Apply each app's custom domain to the corresponding Render web service.
Note that it will take some time for your DNS changes to propagate, and for Render to then provision a TLS certificate for your domain.
Next steps
Congratulations! You've successfully migrated your Heroku app to Render.
Next, explore more of Render's capabilities. Here are a few to get you started:
- Learn about additional service types you can deploy on Render, such as cron jobs.
- Control access to your Render Postgres database and Key Value instance.
- Invite team members to join you on Render, and configure their user roles.
- Use Render's Infrastructure as Code to define and modify your services.